อันนี้ด้วย http://armanbohn.com/blog/2008/05/22/homemade-usb-camera-shutter-release/
Canon did not include a remote trigger option in this camera, however there are many times when I have wanted one. Recently, though, the CHDK people figured out that you can use the USB port on the camera as a trigger. It’s a great hack- the camera already has hardware to detect when the camera connects to your PC, so they captured that event and made it scriptable. This works well for what I wanted to do, which is to take long exposure shots without disturbing the camera. A potential drawback to this method, however, is that the camera can take up to a second to respond to the trigger. This means it will not be useful for syncing captures to a fast event. There are two parts to this project, building the hardware and getting the CHDK program running on your camera. Some quick instructions are after the break.
First, the hardware:
This is the schematic we want to achieve: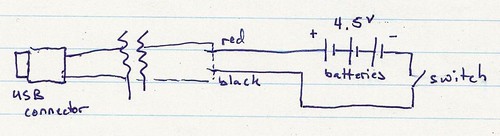
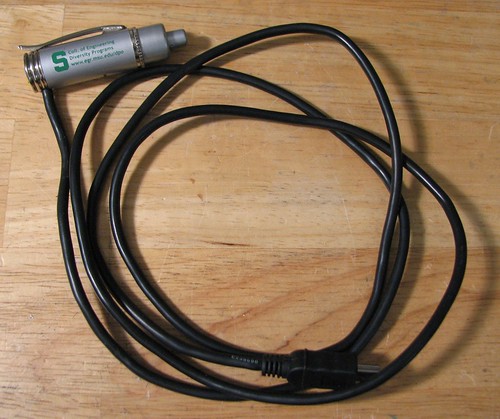
You could build a box and put the components in it, however I found a light-up pen that has all the parts in it. It also occurs to me that something like a mintyboost would also work, if it has a switch to turn the power on and off. Here are the parts before disassembly: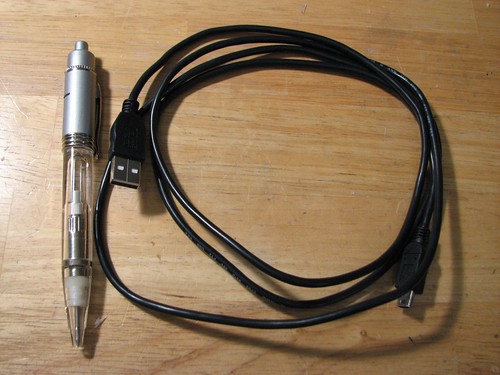
Once the hardware is done, the second part is to get the software set up. I first downloaded the ‘allbest’ build of CHDK from here. The files DISKBOOT.BIN and PS.FIR should be extracted and placed in the root directory of the camera’s SD card (you need a card reader for this). Next, put the card in the camera, and turn it on in play mode (it is important not to go into record mode first). There should be a menu option called ‘update firmware’, select that and agree to everything. This should cause CHDK to load and set up a directory structure on the card. Turn the camera off again, take the card out and put it back in the computer. There should be a CHDK directory on the card now. Copy the following uBasic script to a text file called remote.bas, and save it in the CHDK/scripts/ folder (which should have been created automatically):
The script came from here:
@title Remote button
:loop
wait_click 1
is_key k "remote"
if k=1 then shoot
goto "loop"
end
Now, put the card back in the camera again, and do the firmware load deal again to get the CHDK software running again. CHDK never installs itself on the camera, however there is a way to make it load automatically if you are interested. Get into ALT mode (which assigns different commands to the buttons) by pressing the ‘print’ button on the camera. Once in ALT mode (it should say 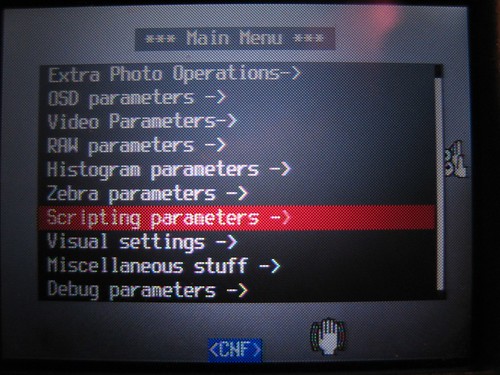
Then select ‘load script from file’, choose the remote.bas script created earlier, and make sure ‘enable remote’ is selected in the scripting menu.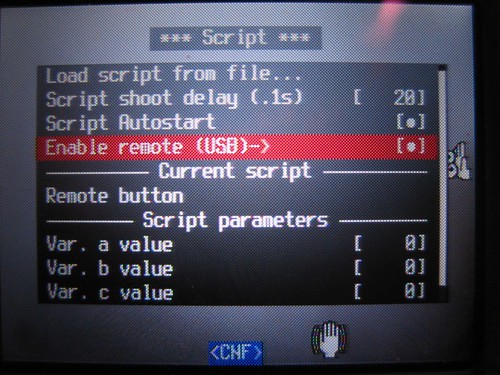
Close the menu and press the shutter button to start the script. If all went well, the screen should look something like mine below. Plug in the remote and press the button to take a picture!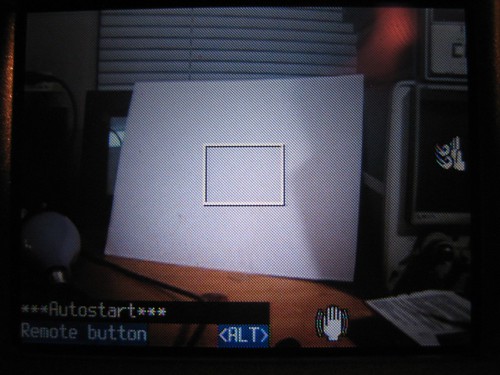
--------------------------------------------------------------------------------
Thanks to someone over on this website, I was able to convert a clicky pen into USB shutter release. It is designed for and works great with my CHDK modified A640.
With some electrical tape, my soldering iron, some tin foil, a few batteries and a push button switch, I was able to get this thing working in about an hour.
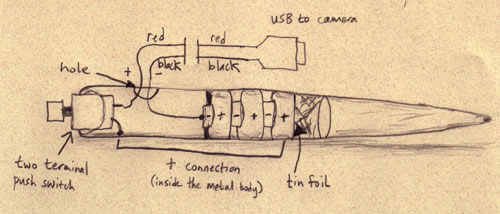
[Note - you have to use a metal pen that conducts on the inside]
I cut the “computer” end off of the USB cable and soldered the black wire to the negative lead of the battery. I smashed some tin foil down in the end of the pen so that the positive side would make contact with the inside of the metal body. This was conected to one side of the push button switch. The other side was connected to the red lead of the cut USB cable.
Now I can shoot controled single frame animation with my 10 mega pixel camera!
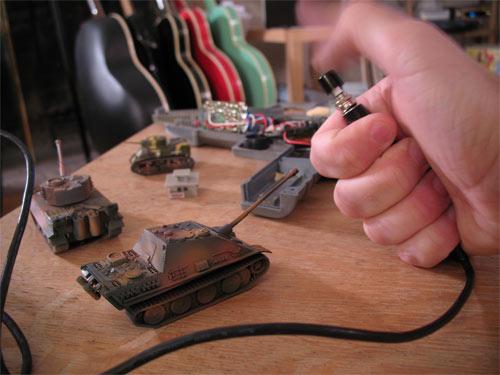
I also got my little bunkers and tanks for the “Combat” shoot which is coming up soon!
1 ความคิดเห็น:
น่าสนใจมากกกกก แม้จะเปลืองถ่านเล็กน้อย
แสดงความคิดเห็น